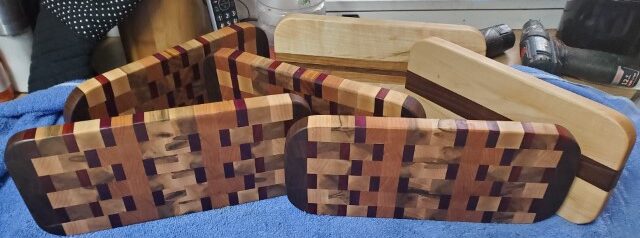
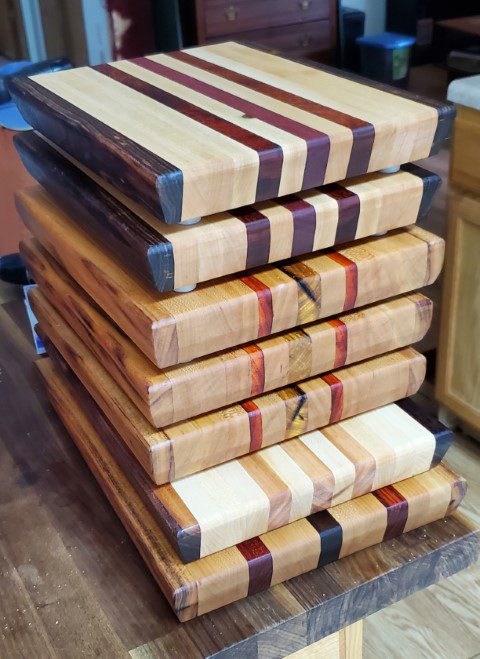
After completing the cutting boards that I am going to take to the GACE convention in Augusta, Ga, I decided to make a few butter boards. Six were made in total. Four of the boards were end-grain and the final two were edge-grain.
After setting the size on the end-grained boards that I built for sale, I had some spare pieces. They were large enough to make butter board approximately 5 1/2″ x 10″ in size. I glued the pieces together using TiteBond III Ultimate and clamped them for an overnight curing. I removed the boards from the clamps the next day and left them unclamped for a day to let the wood relax.
After a relaxation for the boards, I gave a vigorous sanding. I used 40 grit sandpaper on my belt sander to flatten the boards where they had slipped a bit while clamping. After flattening the boards, I then sanded them using 120, 180, 220 grip sandpaper on my random orbital sander. After the 220-grit sanding, I wet the boards to force the wood fibers to rise. I then re-sanded with 220-grit sandpaper and finally finished up with 320-grit sandpaper.
I then rounded the corners using my belt sander and 40-grit sandpaper and sanded the edges with 220- and 320-grit sandpaper. By this time, the boards were as smooth as a baby’s kiss.

The edge-grain boards went through the same gluing, sanding and wetting process as the end-grain boards except, they got to enjoy a ride through my planer, Dewalt DW735, and get smoothed out. These boards were made from my scrap box. One of the boards was made from Walnut and Hard Maple and the second was Walnut, Hard Maple and Cherry.

Left board: Hard Maple, Walnut and Cherry
Right board: Hard Maple and Walnut
After the sanding was finished, I applied my logo to the bottom of each board with a branding iron.

The boards were then given feet. I applied four Woodkay Rubber Feet from Amazon, to the bottom of each board using the stainless-steel screws that shipped with the feet.
After all the pain and torture the boards went through, they finally got a chance to relax. Each board got a relaxing one-hour soak in food-grade mineral oil that was ordered through Amazon.

The mineral oil really makes the colors of the different wood pop.

After their bath, the boards were left standing over night so that the oil could soak into the boards and prepare them for a beeswax rubdown. I make my own board butter to seal the boards and help prevent water from soaking into the boards.

Board Butter Recipe:
- 4 cups food-grade mineral oil
- 1 1/4 cups of white beeswax
- 1/4 cup of carnauba wax
- 10-12 drops lemon essential oil
The mineral oil and both waxes are placed in a pot over medium-low heat until all the wax is melted. The pot is then removed from the heat and 10-12 drops of lemon essential oil is added to the mixture.
After adding the lemon oil, the mixture is scooped into metal tins to cool. I purchased the tins from Amazon. A link to the tins is provided below.
- LIYAR 3-oz white tins – Amazon
- LIYAR 3-oz black tins – Amazon
- LIYAR 4-oz pastel orange tins – Amazon
- Healthcom 6-ox black tins – Amazon
After the boards are given a thorough massage with the board butter, they are finally ready for packaging. The board along with “Use and Care” instructions, a list and description of the various wood used in each board and a 3-oz tin of board butter, is placed in a shrink wrap bag. Using a heat gun, the packaging is shrunk, sealing everything together.
For more information on butter boards, check out “How to Make a Butter Board” from iamafoodblog.com.


