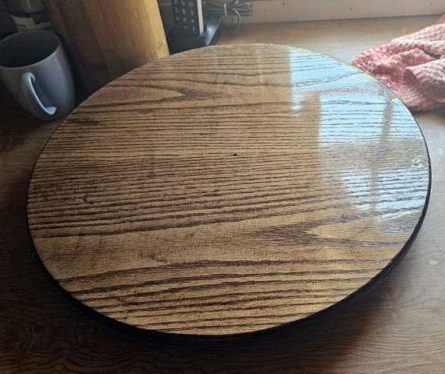
This time it’s Lazy Susans from the shop. I had bought some Red Oak and Cherry lumber to make some noodle boards. There was quite a bit of lumber remaining so, I decided on Lazy Susans.
I was at one of my daughter’s house, and she had a Lazy Susan that she had bought. It actually revolved on a single pin so, it was a bit wobbly. I knew that I could do better than that. So, I set out on a quest to build a better Lazy Susan. I decided on something about 18-inches wide since my circle cutting jig maxed out at 18-inches.
Construction:
To remove excess lumber and create a smooth surface, the boards’ edges were trimmed. Then, TiteBond III bonded the boards together, forming a slab about 19 inches square. After the glue cured overnight, the clamps came off, and sanding refined the slab’s finish
I had a chance to finally use the Jasper circle cutting guide that I had purchased two years ago. The Jasper circle-cutting jig was to 17 3/4 inches before beginning the cutting process. The resulting circles were, requiring only minimal sanding on the edges to achieve a smooth finish on the boards.
Assembly:
I had sufficient materials to construct two pieces of each wood type. The two Red Oak Lazy Susans were stained with Minwax Walnut, while Cherry was treated with a Cherry stain. After allowing the stain to dry completely for a full day, applied four coats of MinWax Warm Satin polyurethane.
After the polyurethane had cured, it was time to assemble the Lazy Susans. I first screwed the mechanism to the base plate in which I had previously drilled two holes so that I could put the screws in the turntable.
I gave the two Red Oak Susans to my daughters as birthday presents and one of the Cherry Susans I gave to the lady that own the Saddle Up Saloon as a wedding gift. The other Cherry Susan was sold to one of the patrons at the bar.